- Introduction
- Starting and Stopping the Web Interface
- Navigating the Web Interface
- Connecting with a VNC Client
Introduction
Now we have some virtual machines running, you are probably wondering “How do we connect to them?”
miniweb is a standalone webserver for minimega. It replaces the web API that existed until the 2.3 release. We split miniweb out to improve maintainability and ease feature development. As such, miniweb has many more features than the old web API.
Starting and Stopping the Web Interface
miniweb talks to minimega using the domain socket in minimega’s -base directory. For this reason, it must be run on a node that runs minimega, preferably the head node.
If you started minimega using launchme.sh (see Module 5, “Bash Script”) then this will be handled for you, but if not run:
# tmux kill-session -t miniweb 2>/dev/null
# tmux new -s miniweb -d
# tmux send-keys -t miniweb "cd /home/ubuntu/minimega && sleep 5" C-m
# tmux send-keys -t miniweb "bin/miniweb" C-m
You can customize launchme.sh to run miniweb with different flags:
root@ubuntu:~/new/minimega# bin/miniweb -h
miniweb, Copyright (2017) Sandia Corporation.
Under the terms of Contract DE-AC04-94AL85000 with Sandia Corporation,
the U.S. Government retains certain rights in this software.
usage: miniweb [option]...
  -addr string
        listen address (default ":9001")
  -base string
        base path for minimega (default "/tmp/minimega")
  -bootstrap
        create password file for auth
  -cert string
        cert file for TLS in PEM format
  -console string
        path to minimega to enable console (e.g. bin/minimega)
  -key string
        key file for TLS in PEM format
  -level value
        set log level: [debug, info, warn, error, fatal] (default error)
  -logfile string
        specify file to log to
  -namespace string
        limit miniweb to a namespace
  -passwords string
        password file for auth
  -root string
        base path for web files (default "misc/web")
  -v    log on stderr (default true)
  -verbose
        log on stderr (default true)
Some important flags are -addr which accepts a host:port tuple to listen on, -base to match minimega’s -base flag, and -root to specify the location of the web files (misc/web/ in the repo).
Logging is controlled with -level, -logfile, and -v / -verbose.
For example on port 8080:
# tmux kill-session -t miniweb 2>/dev/null
# tmux new -s miniweb -d
# tmux send-keys -t miniweb "cd /home/ubuntu/minimega && sleep 5" C-m
# tmux send-keys -t miniweb "bin/miniweb -addr ':8080'" C-m
You can stop the web server with:
tmux kill-session -t miniweb
The remaining flags will be described below.
Authentication (-bootstrap, -passwords, -key, -cert)
miniweb supports per-path authentication so that users can be limited to specific namespaces or VMs. The authentication is configured using the -bootstrap and -passwords flags:
$ bin/miniweb -bootstrap -passwords minimega.passwd
Configure /
Username: jon
Password:
Confirm Password:

Add additional users (Ctrl-D when finished):
Path: /vm/fritz
Username: fritz
Password:
Confirm Password:

Add additional users (Ctrl-D when finished):
Path: /vm/john
Username: john
Password:
Confirm Password:

Add additional users (Ctrl-D when finished):
Path:
This generates a password file with bcrypt hashed passwords:
$ cat minimega.passwd
[
    {
        "path": "/",
        "username": "jon",
        "password": "JDJhJDEwJFZzSjNIRjFVbjc5Z2ZReUpxVmRZMS5WU2thaUNHS3RIczk5eExFMS5kdy5VUEQuY1pub1FT"
    },
    {
        "path": "/vm/fritz",
        "username": "fritz",
        "password": "JDJhJDEwJGc0VC93YkNtWVZjMWlteXF1dldrRy5zRkZWVm5GSzMxSjdNZFgwdGp6eklnZmtVaHVuUmhh"
    },
    {
        "path": "/vm/john",
        "username": "john",
        "password": "JDJhJDEwJGRLME5jVVM0bW1LNzBYOWQ2YmNPZ09LLk92NlVPZEJTdTdUT0tYSm84RzA1akZjRWxsbGwu"
    }
]
To run miniweb with this password file, simply drop the -bootstrap flag:
$ bin/miniweb -passwords minimega.passwdAccess to a resource is recursive — if there are rules for jon with / and fritz with /vm/fritz, then both jon and fritz can access /vm/fritz. To limit access to a namespace, foo, the path should be /foo/.
The password file format is intentionally simple so that external scripts can generate it when there are dozens or hundreds of individual path rules.
miniweb also supports TLS to protect the usernames and passwords. It accepts a PEM encoded key and certificate. To generate a key and self-signed certificate, you can use:
$ openssl req -x509 -newkey rsa:4096 -keyout key.pem -out cert.pem -days 365And then start miniweb with:
$ bin/miniweb -key key.pem -cert cert.pemNamespaces (-namespace)
miniweb interacts with namespaces in two ways: the -namespace flag and via URL paths.
When -namespace is set, miniweb only interacts with the specified namespace. This disables the URL path-based method.
The URL path-method allows you to prefix URLs with the desired namespace, for example, /foo/vms shows the VMs page for the foo namespace. /vms shows VMs for whatever namespace the head node is currently in. The /namespaces page displays a list of the available namespaces with links to the VMs and VLAN pages.
VLANs
/vlans shows the active VLAN aliases. It may be prefixed with a namespace to see aliases for that namespace.
Files
/files/ shows a directory listing for hosts in the active namespace. It may be prefixed with a namespace to see listings for hosts in that namespace. Additional subdirectories can be appended to the path such as /files/foo/.
In a later version, miniweb will support uploading and downloading files through this interface.
VMs
The /vms page shows VMs in the active namespace and can be prefixed with a namespace. There are two views — the view from the vm info API and the view from the vm top API. In the VM info table, there are buttons to update the state of VMs. You may start, pause, or kill VMs through this interface. Once a VM is killed, it is no longer shown in the list but can be restarted via the CLI.
Connecting to VMs
miniweb supports VNC for KVM VMs and xterm.js for containers. These are both accessed via the /vm/<name>/<connect> path.
The container’s web console allows multiple users to view the same console at the same time. minimega stores some “scrollback” from the container’s console, so when a new console connects it can re-play recent output rather than present a blank screen.
Note that miniweb assumes that it can directly connect to the VM using the host and port from vm info. This can cause issues if your machine has a firewall that blocks external connections. If you see errors in miniweb’s log that it cannot connect, you may need to modify your firewall rules to allow the connections.
Screenshots
Each KVM VM can returns its current screenshot to miniweb via the /vm/<name>/screenshot.png path
Console (-console)
miniweb includes a minimega console via /console. It is disabled by default but can be enabled with the -console flag:
$ miniweb -console bin/minimega
The -console flag takes as an argument the path to an associated minimega binary executable.
Navigating the Web Interface
[Pictures need to be updated to minimega 2.4+. There is a new tab whose functionality is enabled via the -console flag that is used to issue minimega commands from the web interface; a minibuilder tab has also been added for high-level topology creation. For now this is what it used to look like.]
With miniweb running open your browser to http://ip:9001 and you will be presented with the web interface.
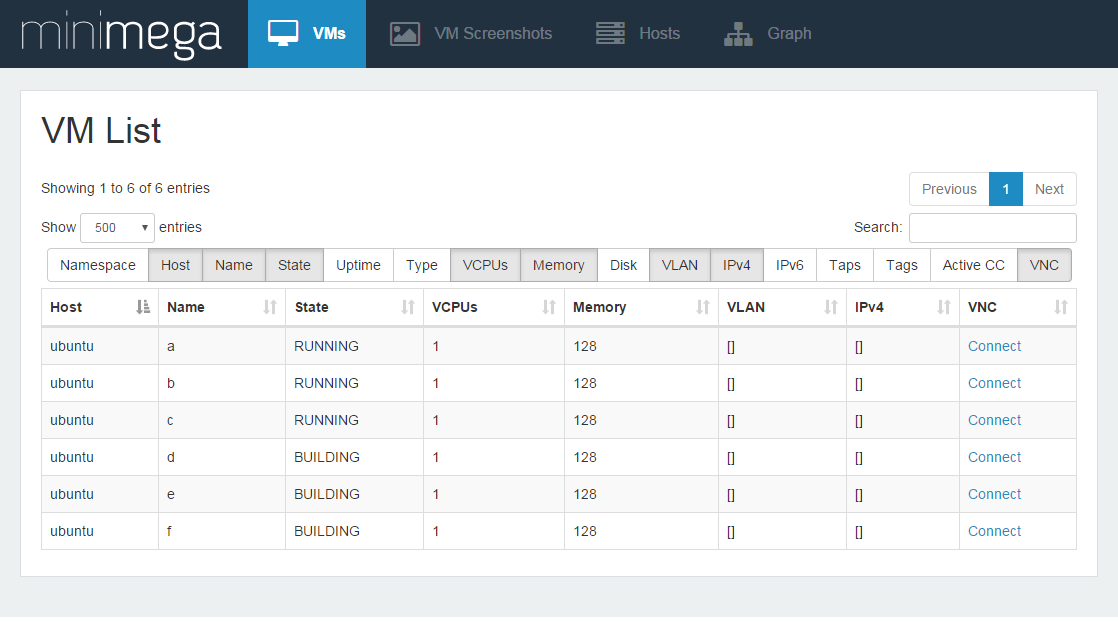
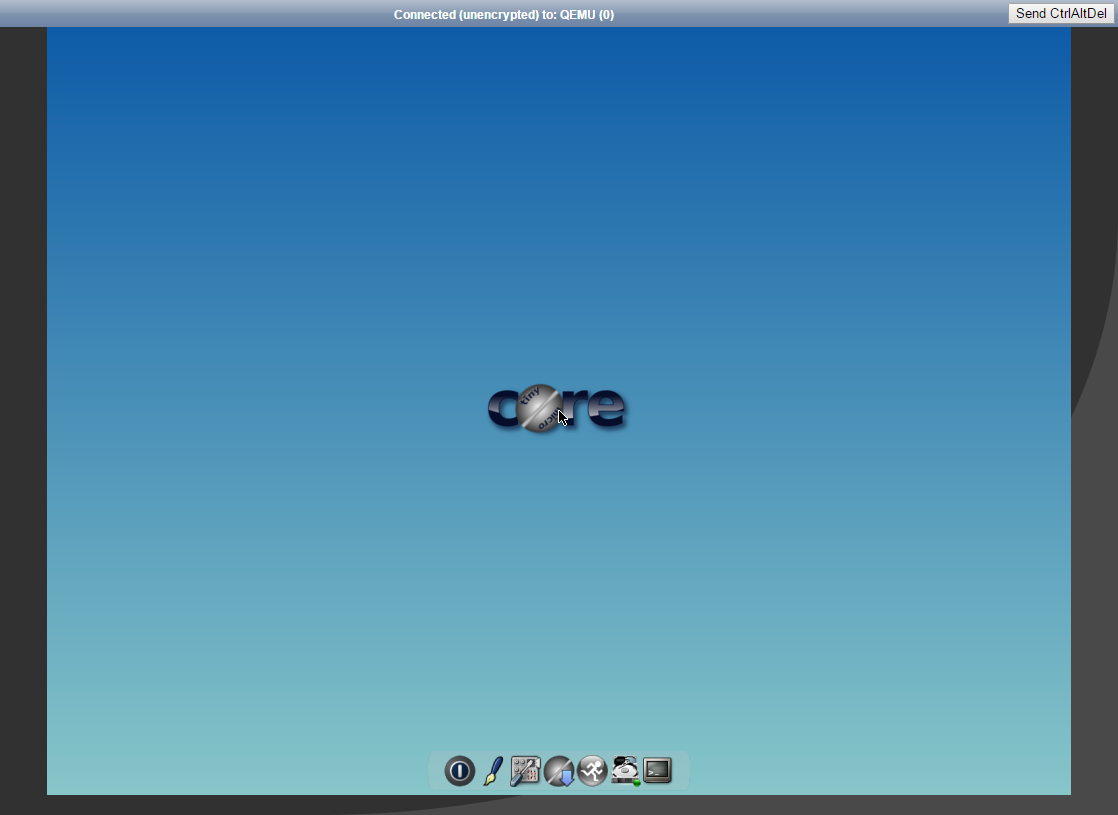
You can click on “Connect” to start a noVNC session with the virtual machine in your browser giving you control of the keyboard and mouse.
Multiple people can connect and share the same keyboard and mouse using the web interface.
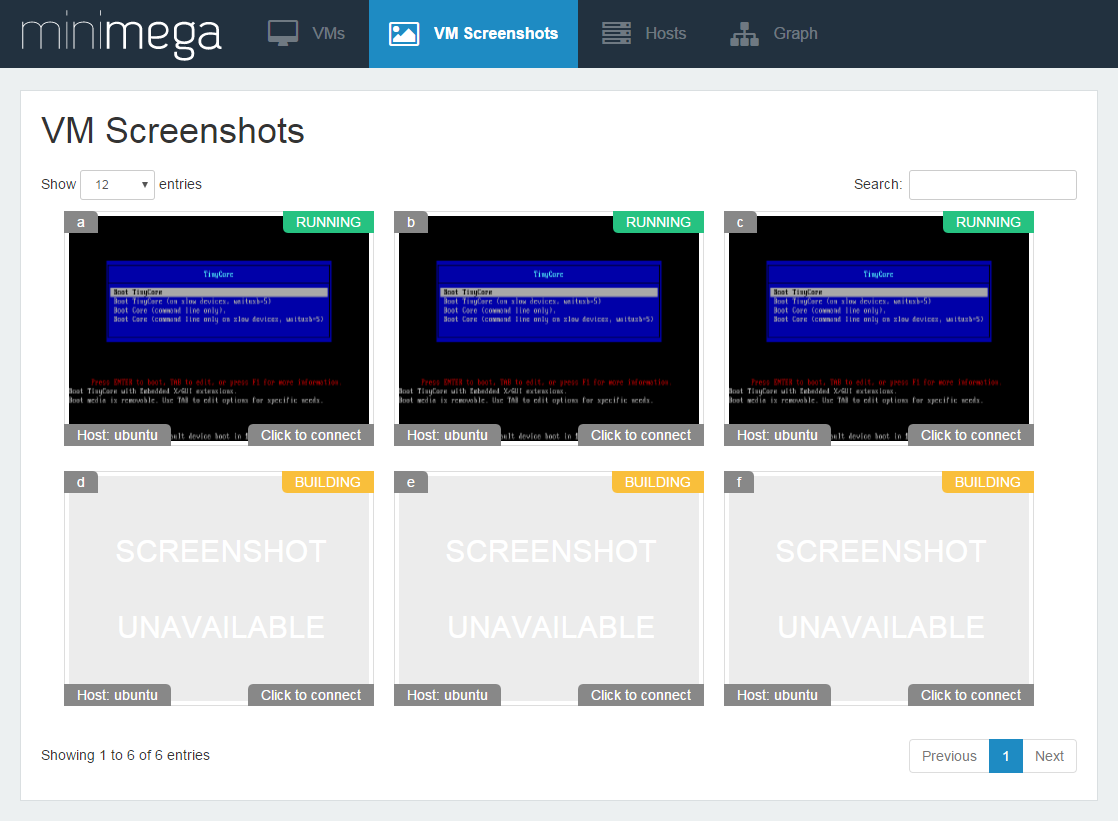
VM Screenshots gives you a tiled view of each VM.
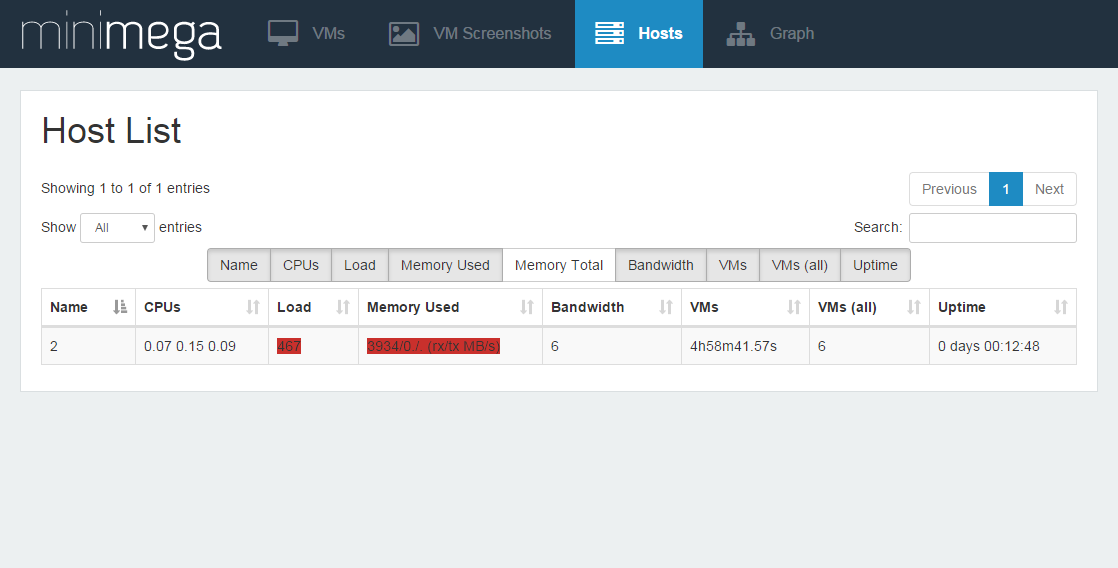
Hosts tells you about servers in the mesh.
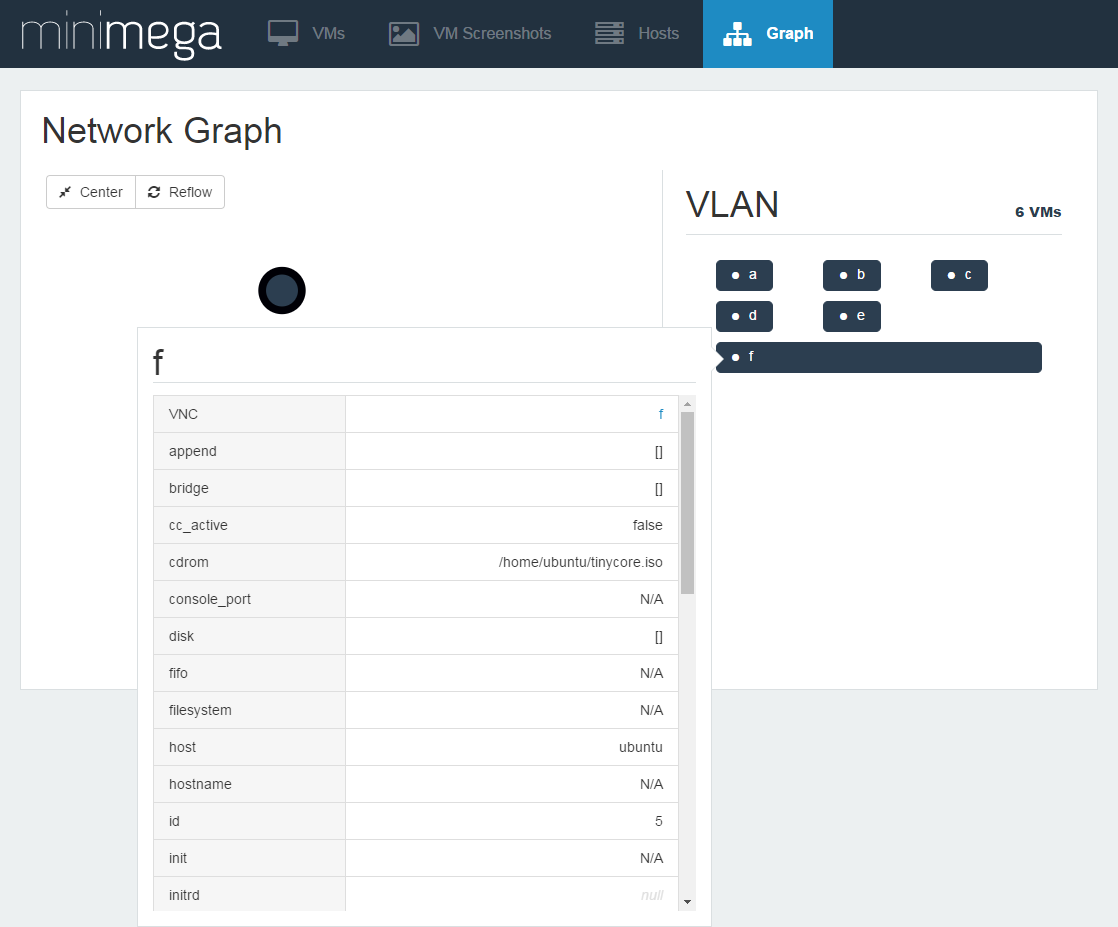
Graph prints a d3 graph of the network, each node in the graph can be clicked on to learn more about it.
Connecting with a VNC Client
You can print the port used for VNC with vm info
minimega:/tmp/minimega/minimega$ .columns name,vnc_port vm info
host   | name      | vnc_port
ubuntu | vm-1      | 35096
ubuntu | vm-2      | 34695
ubuntu | vm-3      | 34878
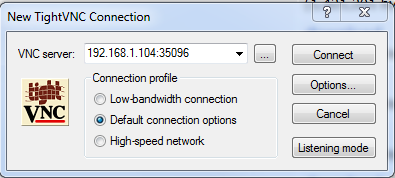
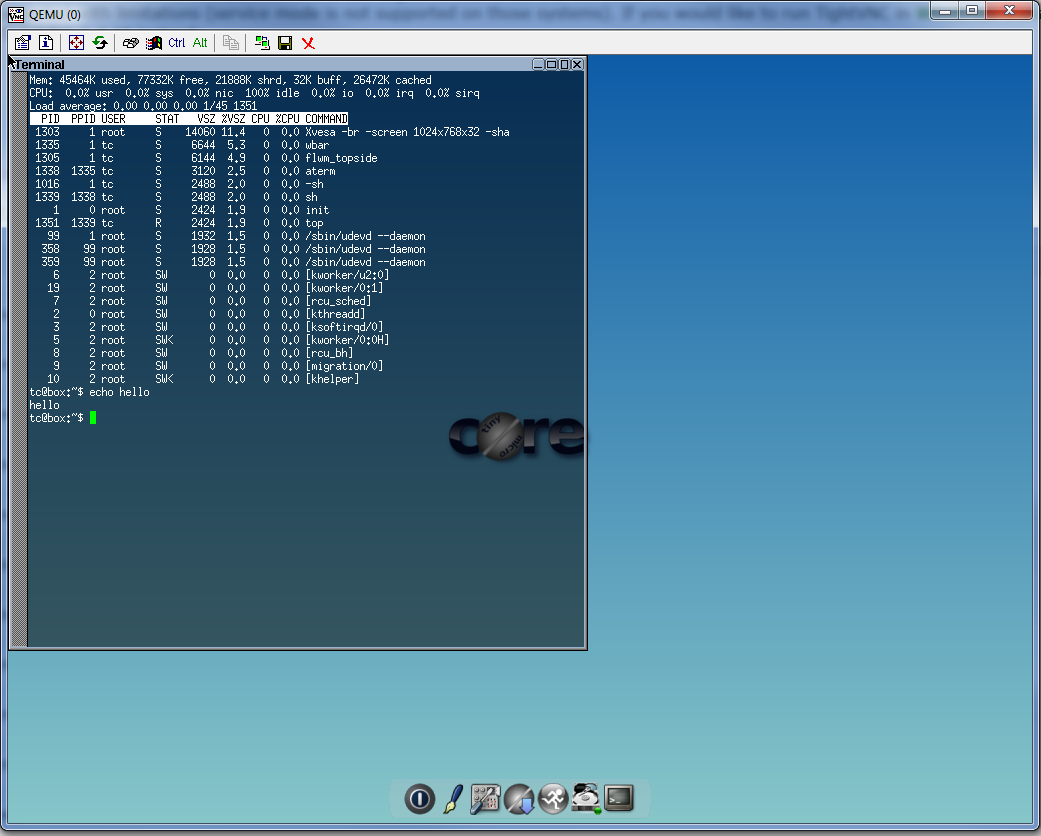
And connect directly with any VNC client.
Note if you use this method the VNC session is not shared and web clients will not be able to access the VM until you disconnect.
Here are some example VNC clients:
Windows – TightVnc 1.3.10, OSX – Chicken, Linux – VNCViewer
TightVNC is pretty straightforward your provide the IP:Port and it will log you in without a password.
Authors
The minimega authors
Created: 30 May 2017
Last updated: 22 April 2022